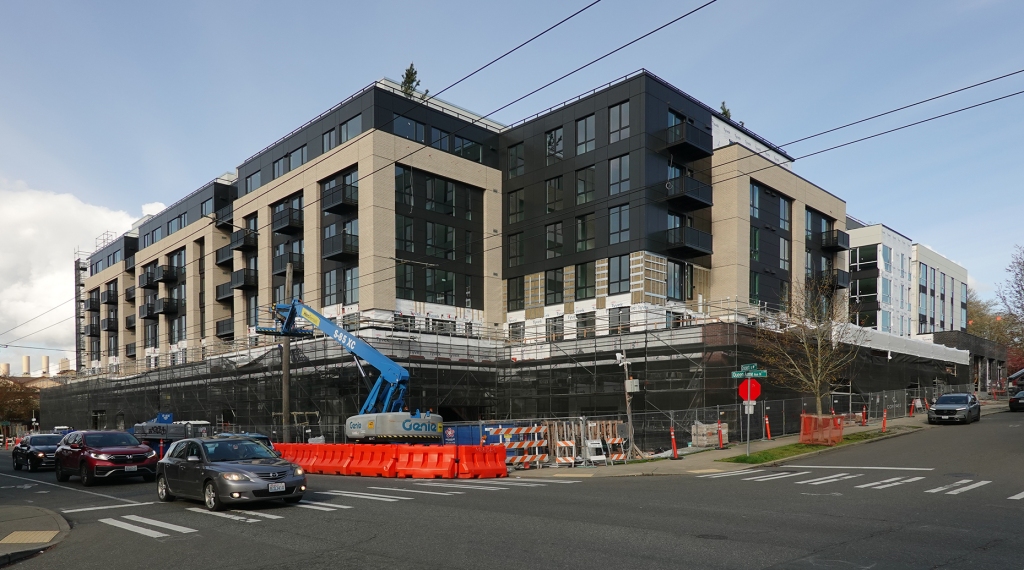
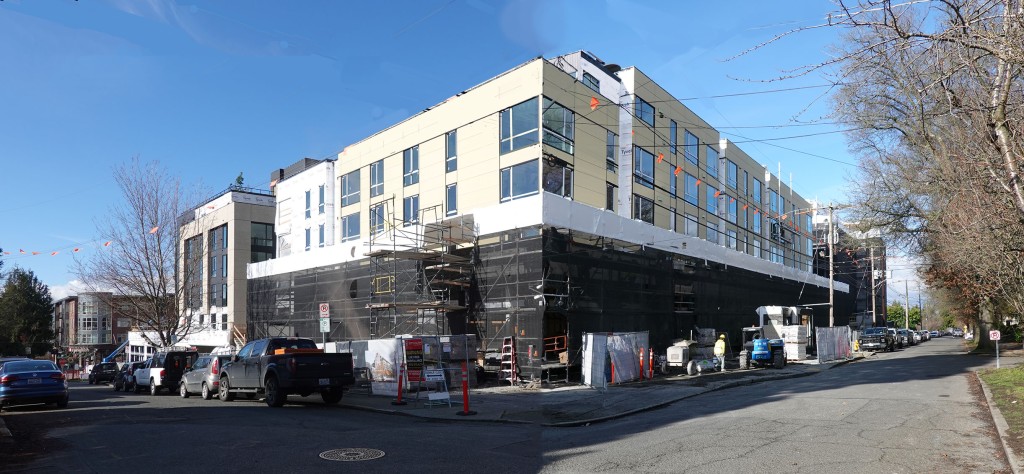
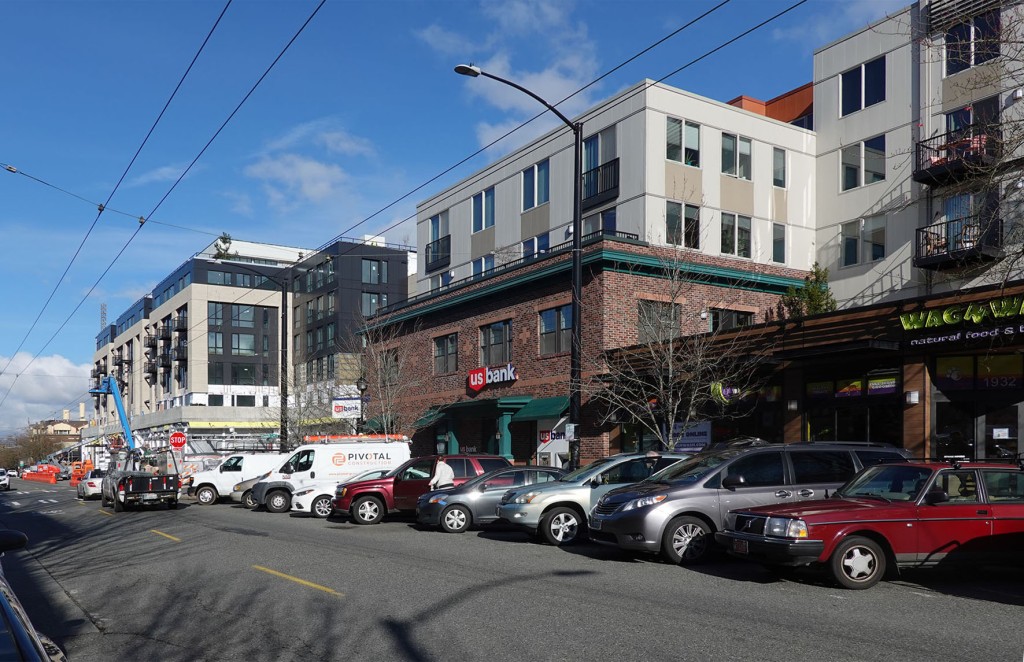
As more of the exterior finishes get completed the form of the final building becomes visible. This is particularly noticeable at the project corners, as here at the corner of Queen Anne Avenue and Crockett Street.
The exterior materials have been selected and located to give the building a kind of visual language that explains what’s happening in the interior. The large, black facades have been “framed” by the light tan brick outlines that, along with the corner setback, emphasize the important visual character of the housing. This will be enhanced at the street level by a band of red brick (just starting to be visible – look behind the stop sign on the lower right) which will add as a ‘wrapper’, signaling where the retail shops, including Safeway, are located.
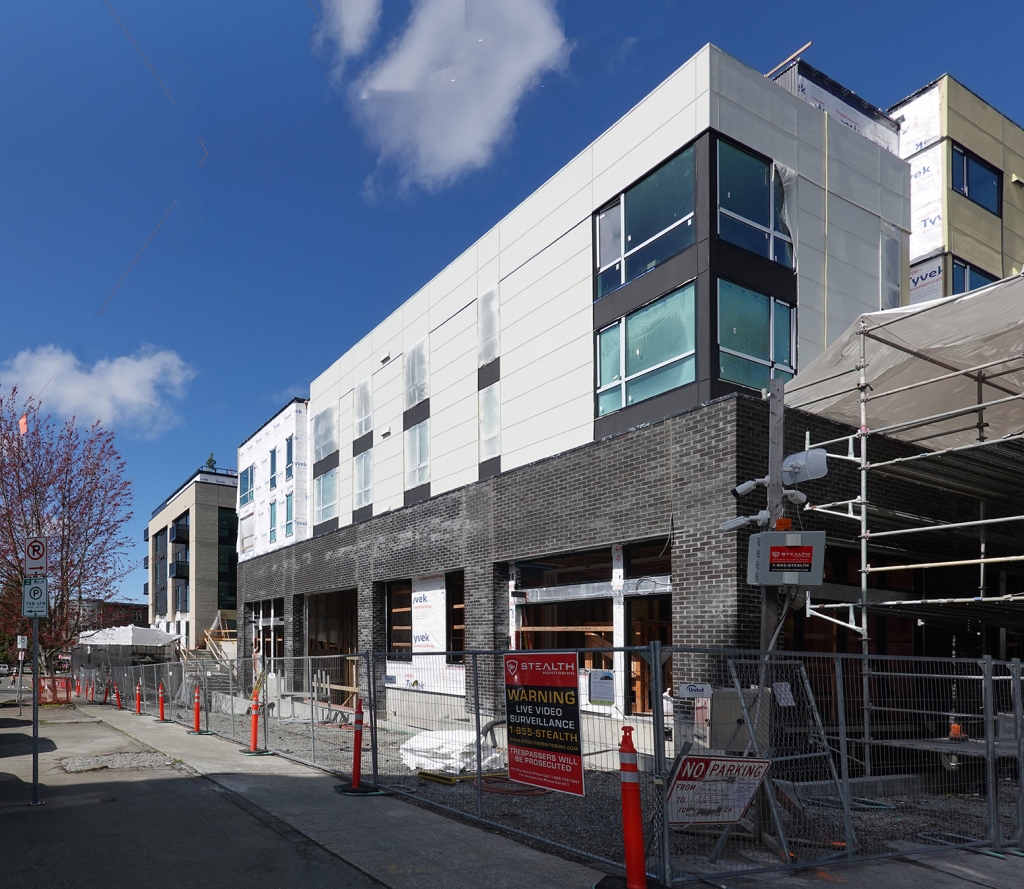
Just up Crockett Street, the scale of the housing along 1st Avenue North gets a different treatment.
Here, the housing above is white, with a strong base of dark brick that wraps the townhouse apartments that anchor the project along First Avenue. Although a little difficult to make out in this view, this is also where the housing levels have multiple set-backs to provide terraces that take advantage of the sunny, south-facing orientation.
The north-east corner of the project features Building A, which houses the leasing and management offices at grade level and creates a strong vertical statement above.
It’s still hard to make out the facade here because of the scaffolding and the fact that it’s proceeding in stages; but it’s clear that it will have distinctive top and bottom floors.
And finally, at Queen Anne Avenue and North Boston Street, the project steps back to provide a recessed corner wrapping around the existing street-level retail.
I suspect that these retail merchants are looking forward to the construction being succeeded by several hundred new resident/shoppers. The general plan is for the new Safeway store to open this fall, followed by the housing next spring.
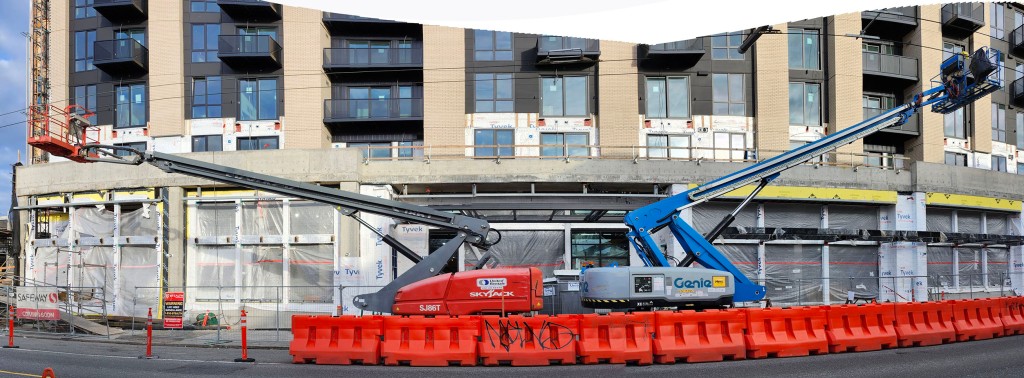
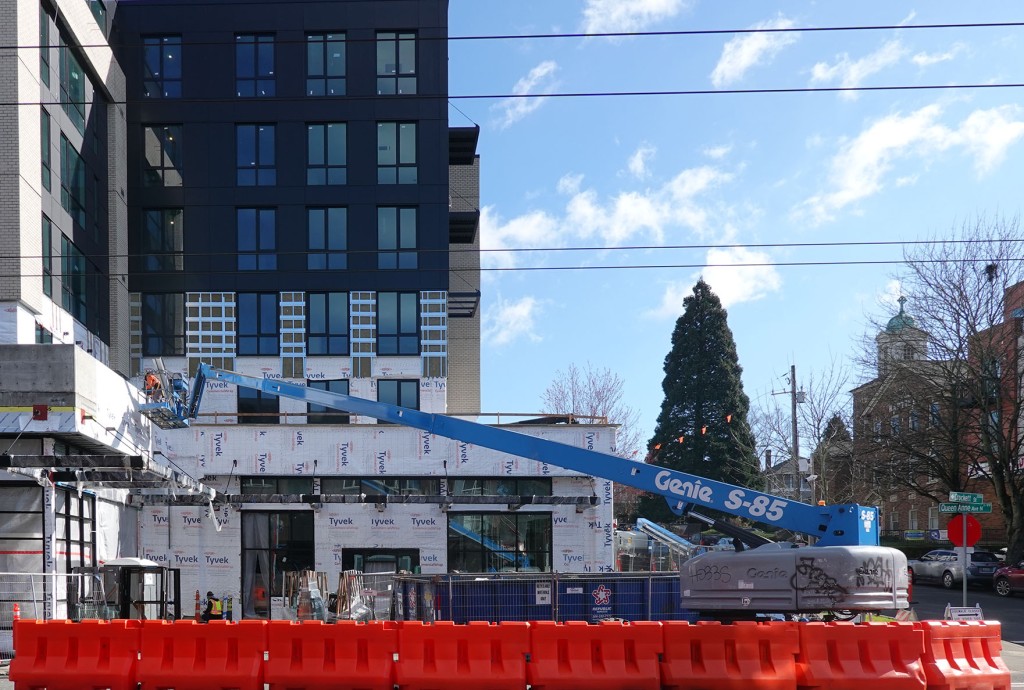
As the 21 Boston housing and commercial project emerges from behind it’s construction scaffolding, the method of working on the exterior has changed as well. Many of the elements, such as balconies, railings, finishes and some windows now need to be installed individually instead of in groups from the scaffolding. Enter the genieuses. Although Genie is a proprietary name (note there’s a Skyjack also on the job), I like the implication that genies have some magic skills for getting the jobs done.
Below, you can see a relatively recent view of the southwest corner, with two of the genies working on balconies on the Queen Anne Avenue side of the project. Basically, they pick up the materials for one balcony at a time and raise them, including the installer, to the next unit that needs one. The installer does all the maneuvering of the Genie from the basket / platform at the end of the boom, including driving the vehicle.
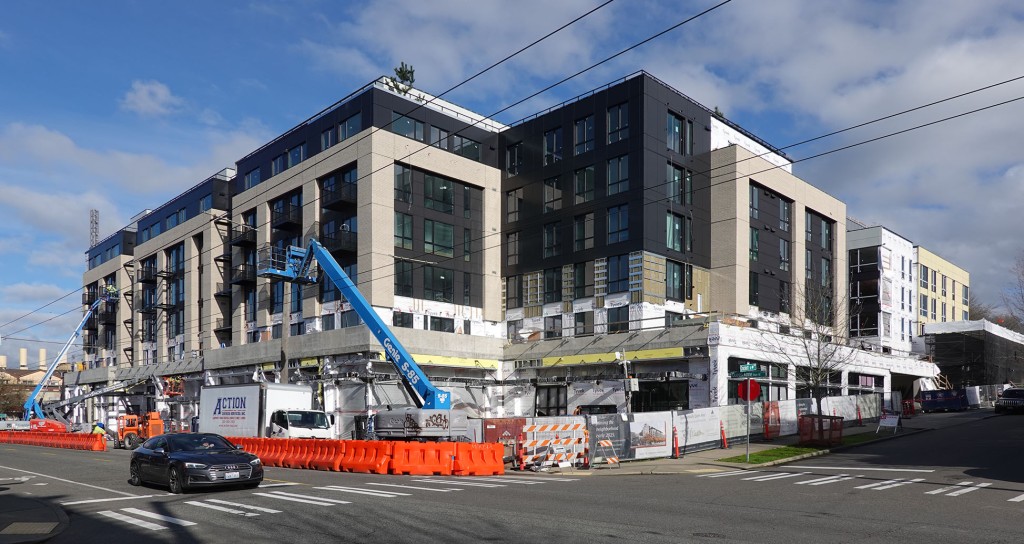
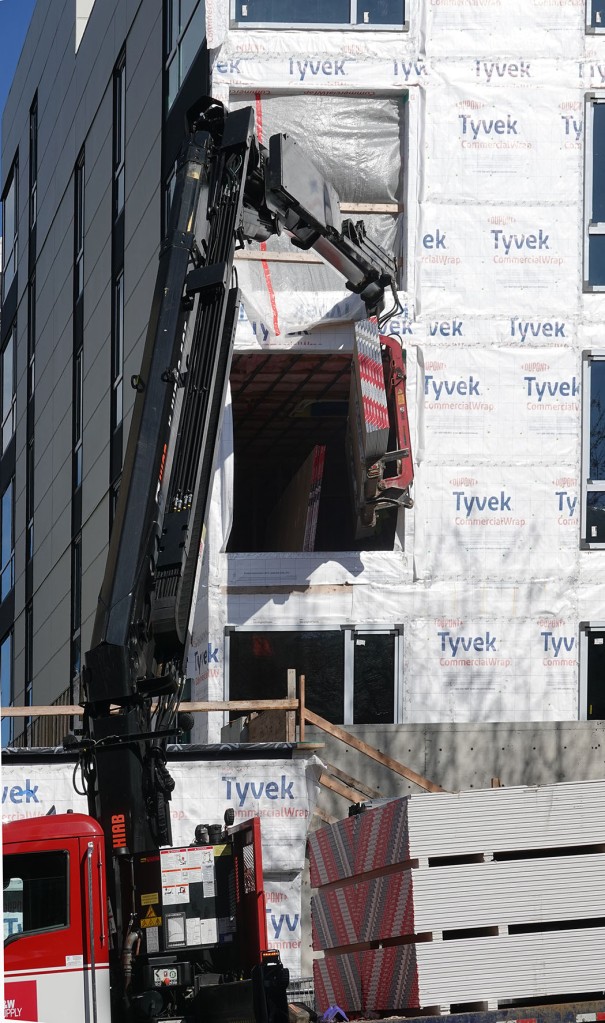
Here’s a view looking up Crockett Street where two of these lifts are doing two different types of lifts: a balcony installation and a sheetrock delivery.
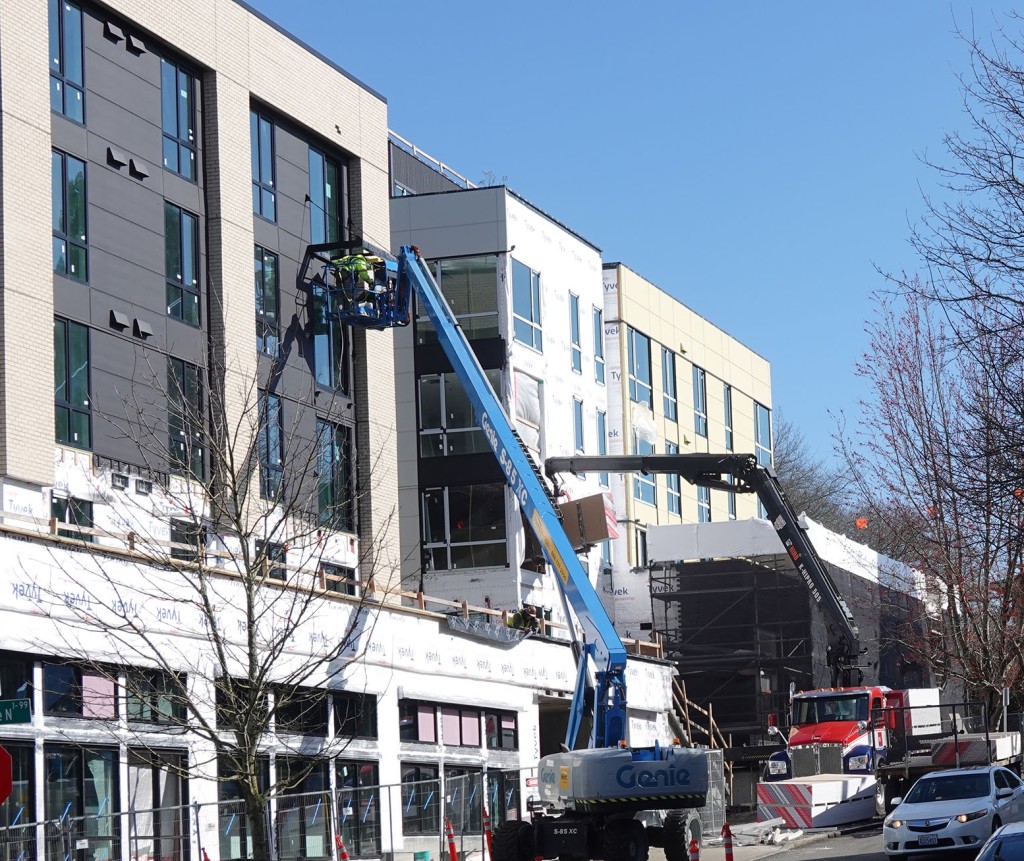
Here’s a close-up of the delivery and installation of the balcony components.
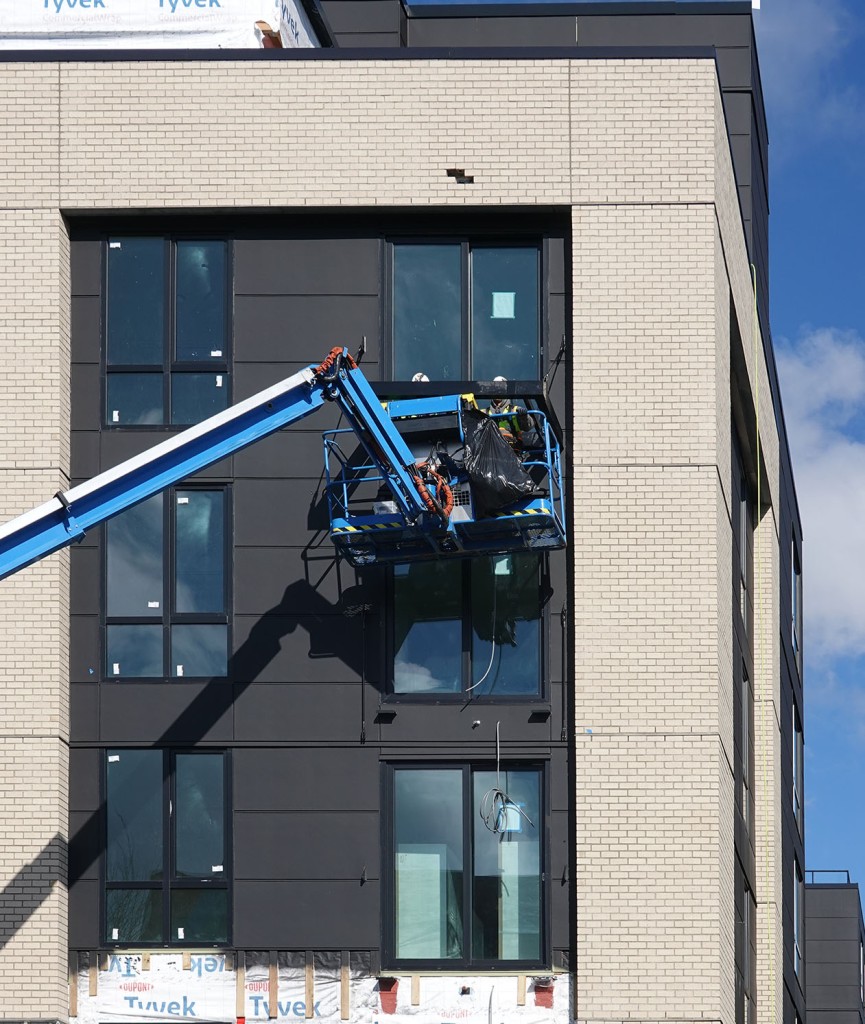
And here, sheetrock is being plunged through an opening where the windows have not yet been installed. This work is more delicate than it appears. Sheetrock, especially in bundles like this one, is HEAVY, so it can’t be moved quickly or allowed to damage the building or be damaged itself. Workmen inside the building slide pairs of sheets off the lift and set them on the floor – backbreaking work if you don’t know what you’re doing.
Closer to the ground, at the open corner of the project where there will be a plaza, another workman applies the appropriate layers of vapor barrier protection to the canopy areas.
One of the key uses of vapor barrier is to shield walls of different materials from water penetration, in effect wrapping the rough construction before the finishes are applied – in this case the dark red brick that will define the grade level Safeway spaces.
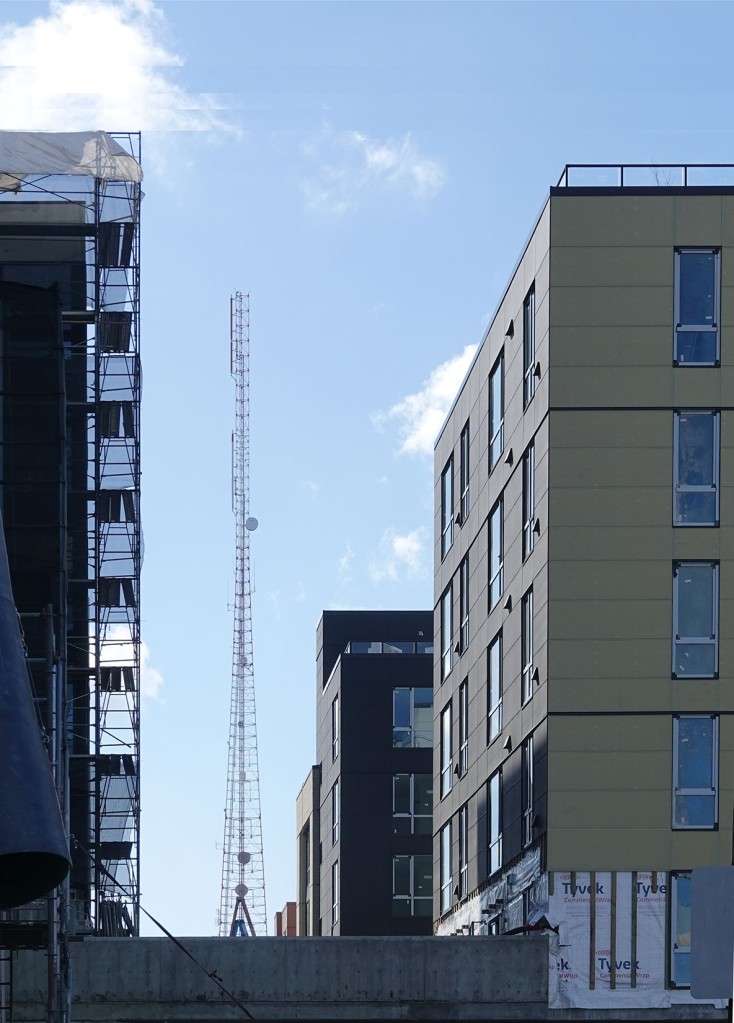
A few other interesting views have been exposed now that the scaffolding is mostly down. In the design process it was decided to leave a visual slot through the project from north to south, approximately where the alley would have been – if there had been an alley. Here’s the view looking north from Crockett towards Boston Street.
This sits right above the entrance to the Safeway store parking garage. The other view looks south from Boston towards Crockett street – and frames one of Queen Anne’s vertical communication towers in the process.
In some places, scaffolding with its protective mesh is still in place, such as here at the corner of Crockett Street and 1st North.
The work going on behind the mesh will make a major contribution to the appearance of the project as well as introduce a different form of housing. This area is being clad in a dark brick, the use of which defines the zone where the townhouse/apartments will be located. These will be unique in that they will have entrances via stoops directly to the sidewalk.
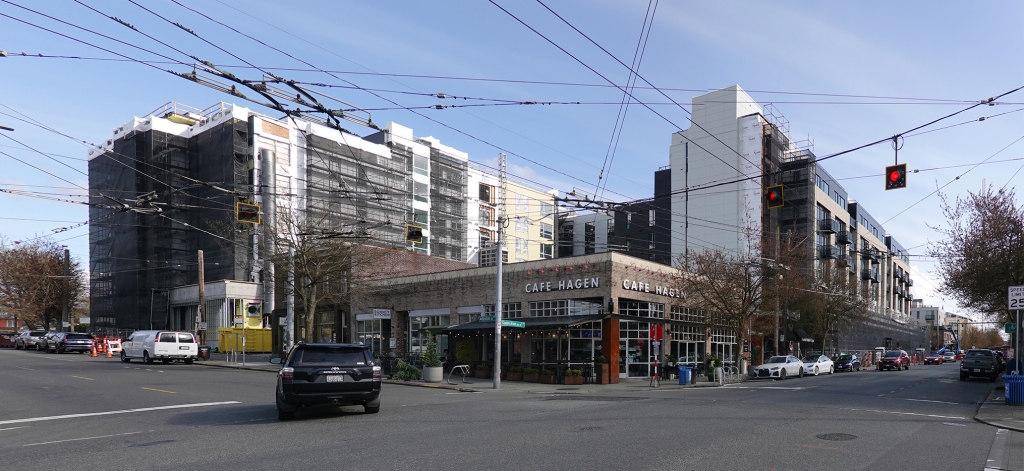
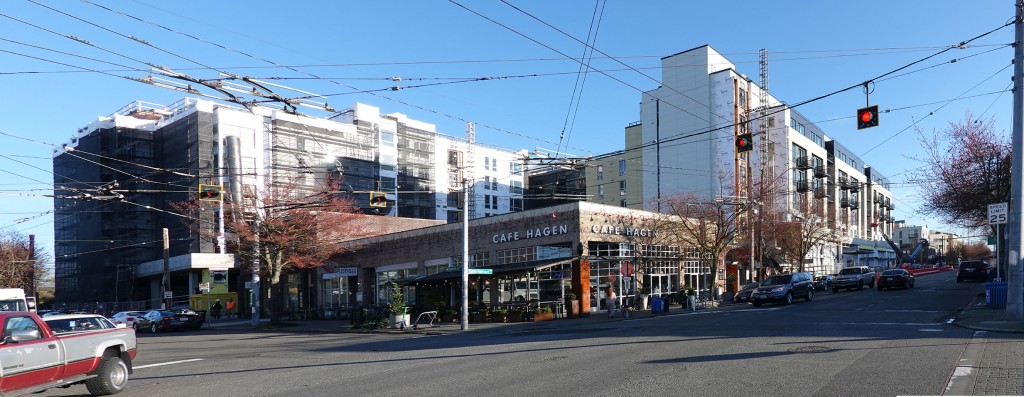
A couple different views are starting to show the ways in which this project is settling into the neighborhood context. Here’s one looking north on Queen Anne Avenue from the area in front of the Towne.
Once the red brick base has been installed, the general massing approach similarities will become evident – not enough to confuse the two projects, but enough to reinforce the housing over retail character of the street as a whole. This can also be appreciated at a distance from the neighborhood.
From this perspective, Queen Anne Avenue merges these forms visually and underlines the location of the spine of the urban village.
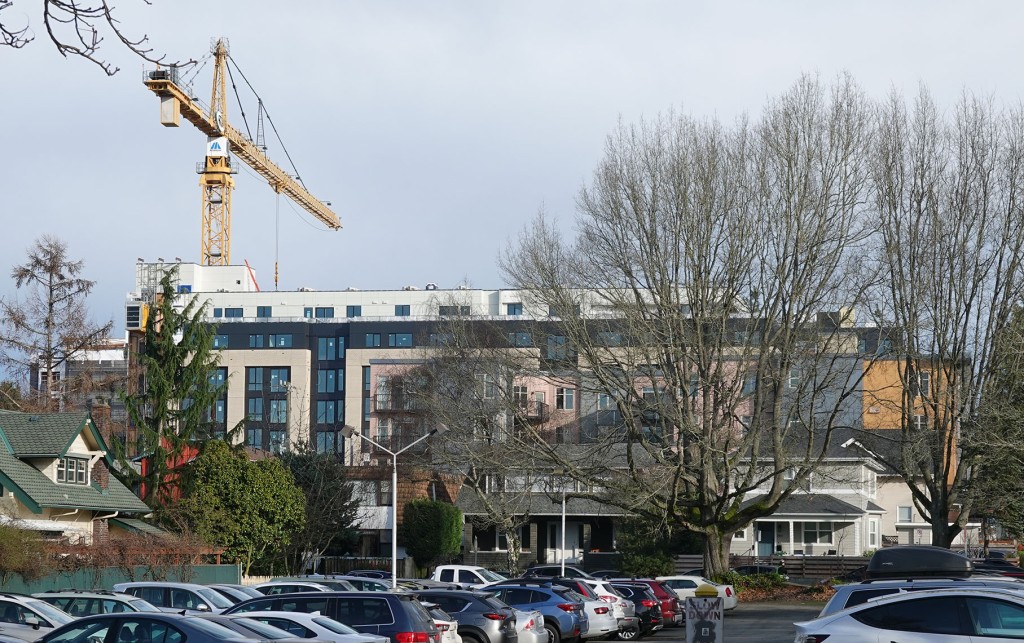
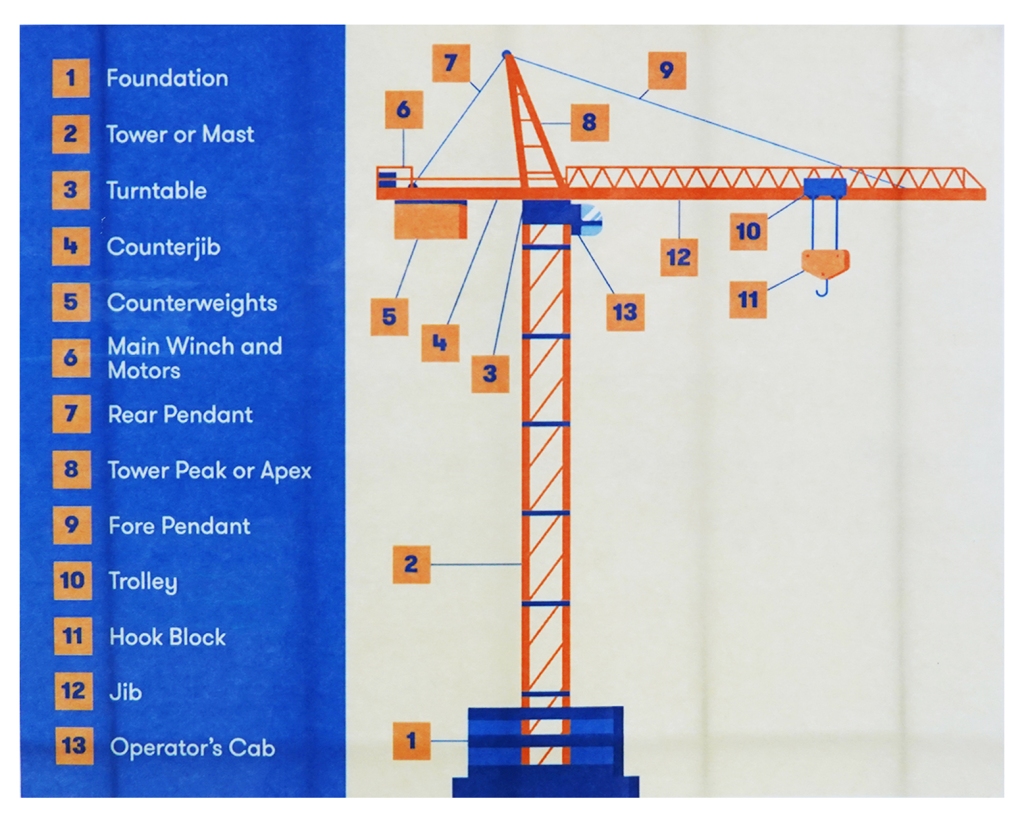
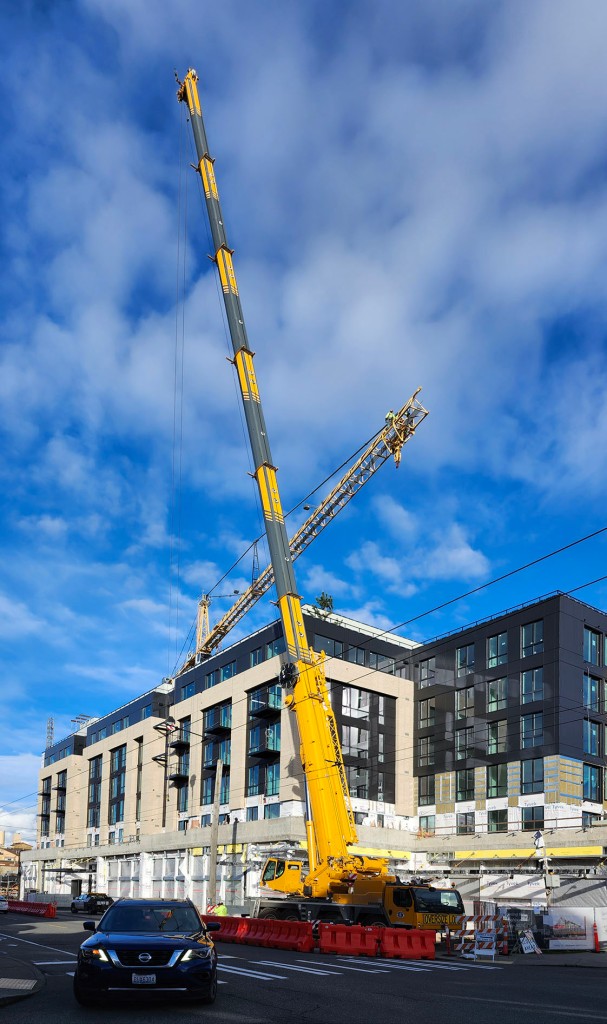
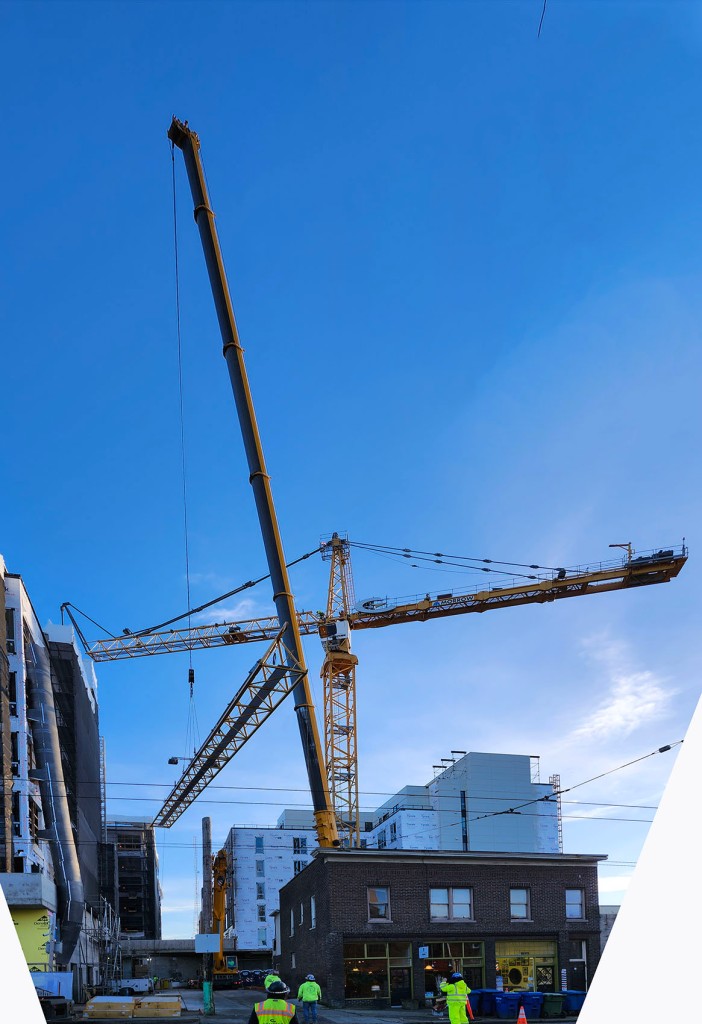
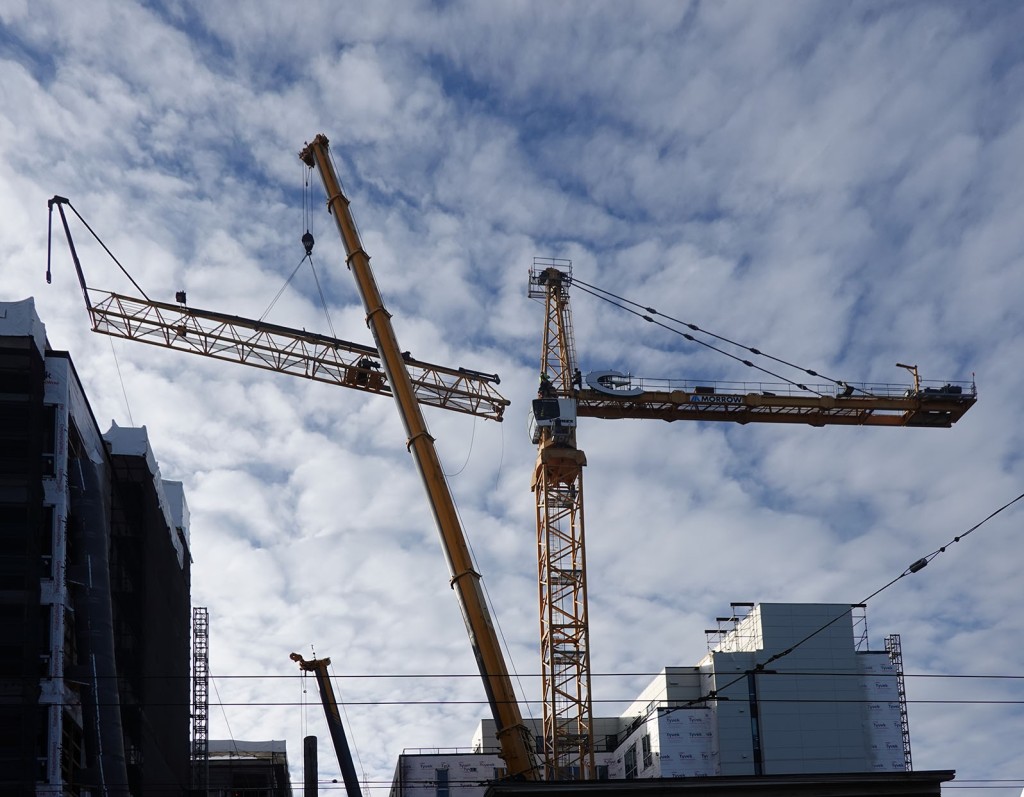
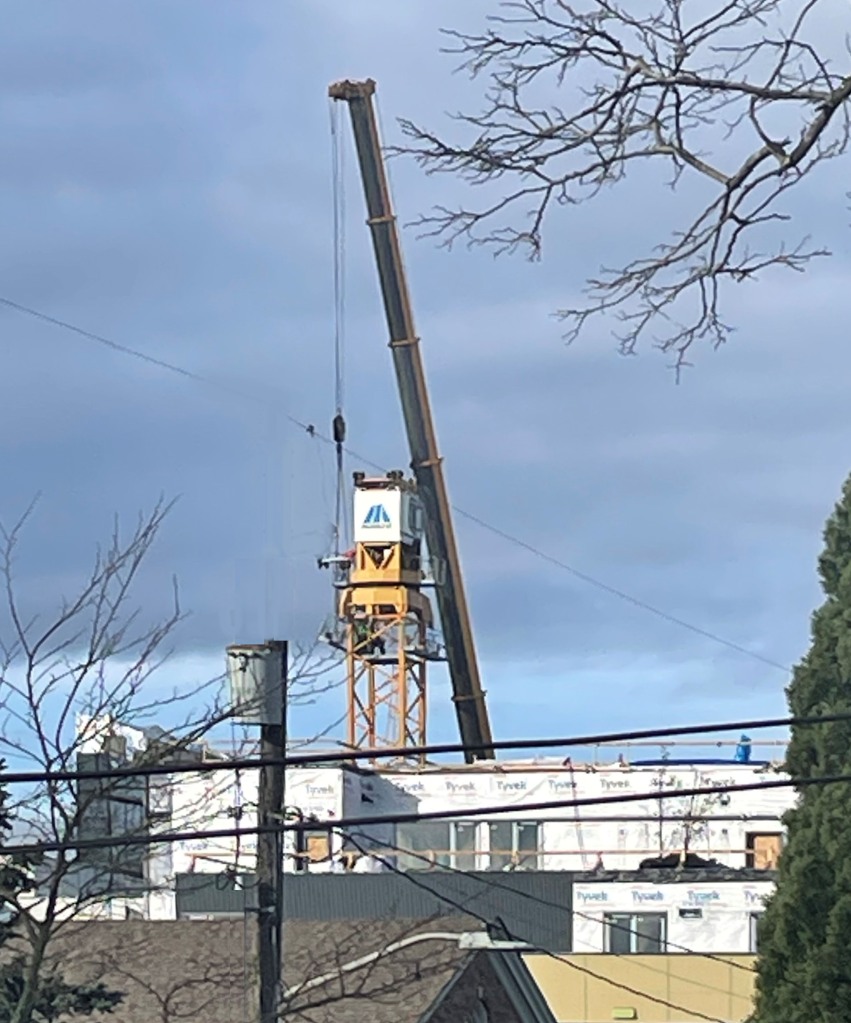
At the beginning of February, as I was observing the 21 Boston project from a couple of blocks away in the neighborhood, I realized that something different was happening – the tower crane was being removed. It’s quite a process, so if you want to bone up on tower cranes, here’s a diagram:
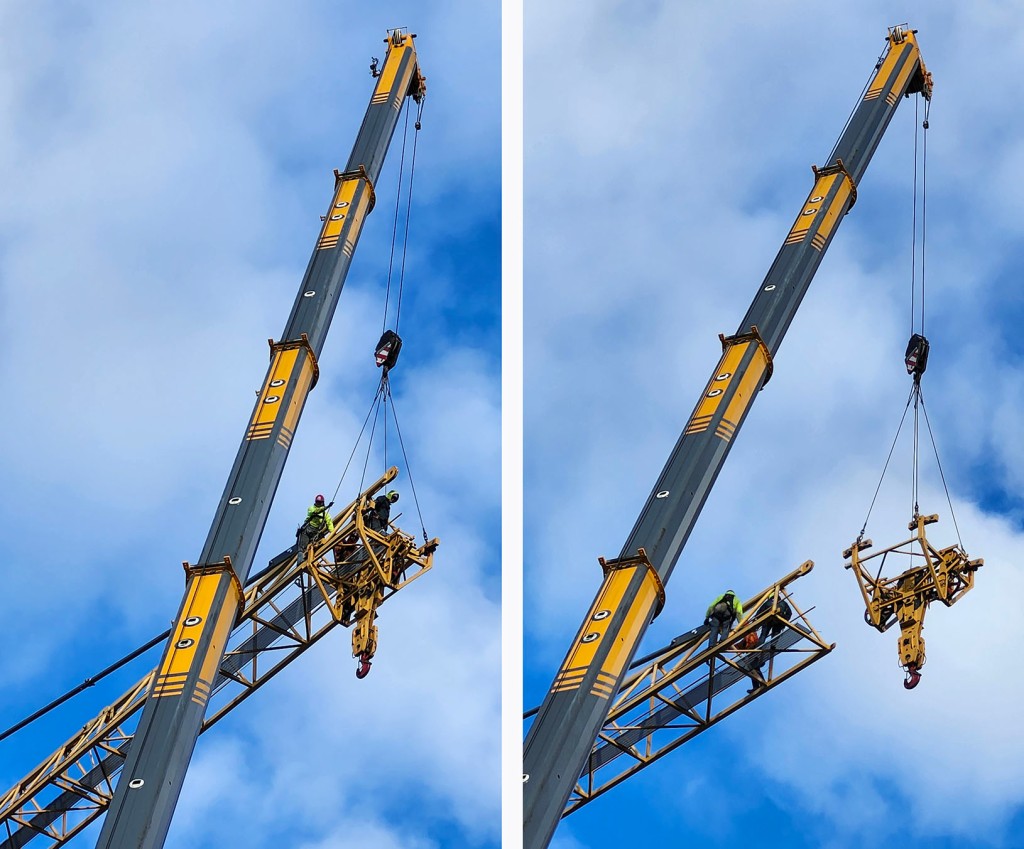
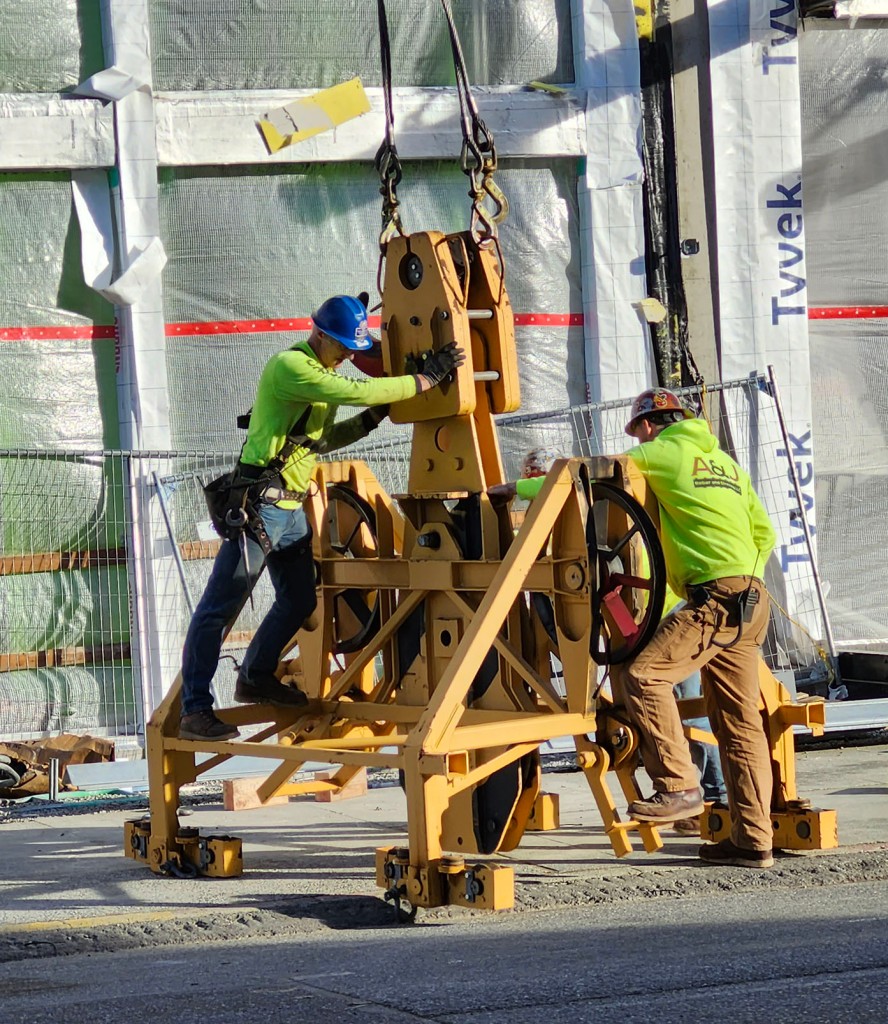
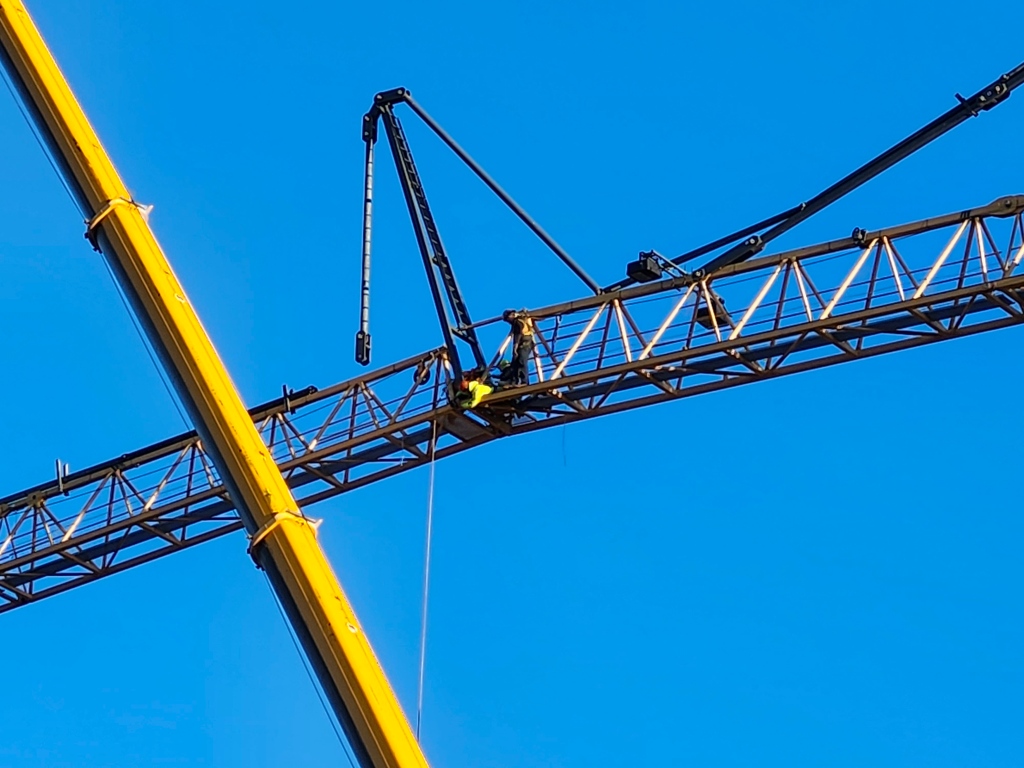
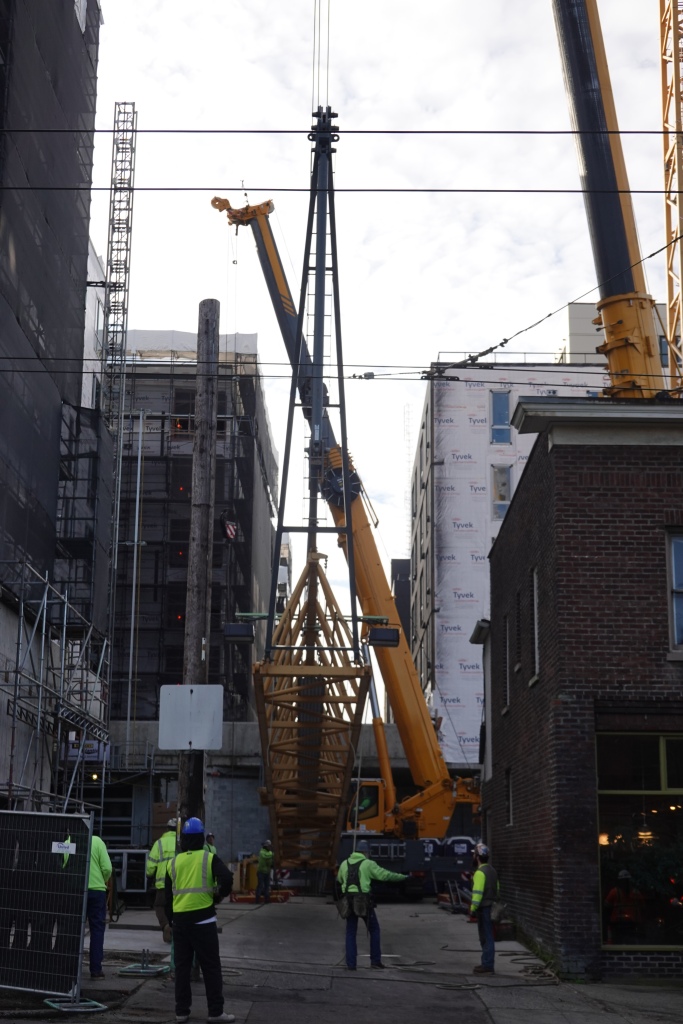
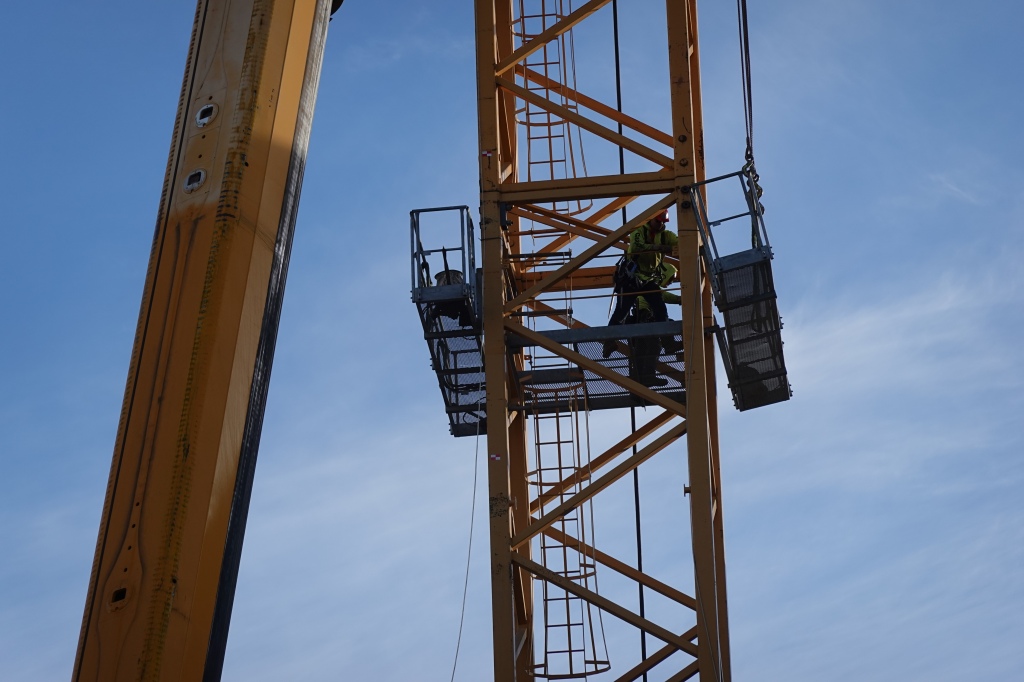
This was posted by Compass Construction at the time that the crane went up, which I covered in an early blog post: https://markspitzerdesigns.wordpress.com/2022/11/06/21-boston-03-tower-crane/ . A key element during both the assembly and disassembly of the crane is maintaining balance and stability among the various moving parts as they are moving, as you will see here. Step one, the removal of the nose, or jib extension, had already been accomplished when I arrived with my camera. This extension is what gave the crane enough reach to nearly cover the whole 5 acre site. Now it was time to remove the trolley, which runs through the jib and guides the cables down to the hook block. This was being done in the southwest corner of the site since, even with the jib extension removed, the jib arm was too long to offload the trolley near the Boston street work yard. You can just make out the two workmen at the end of the jib in the photo below.
The truck-mounted extension-boom cranes are in themselves pretty impressive in that they’re made up of seven cylinders that telescope neatly inside each other for reach, compactness and strength. It’s a dizzying job to free up the trolley;
but it looks so simple afterwards. On the other hand, what looks so delicate hanging in the air above the project, looks pretty muscular sitting on the ground. They had fun getting it turned up-side-down so it could sit on the ground.
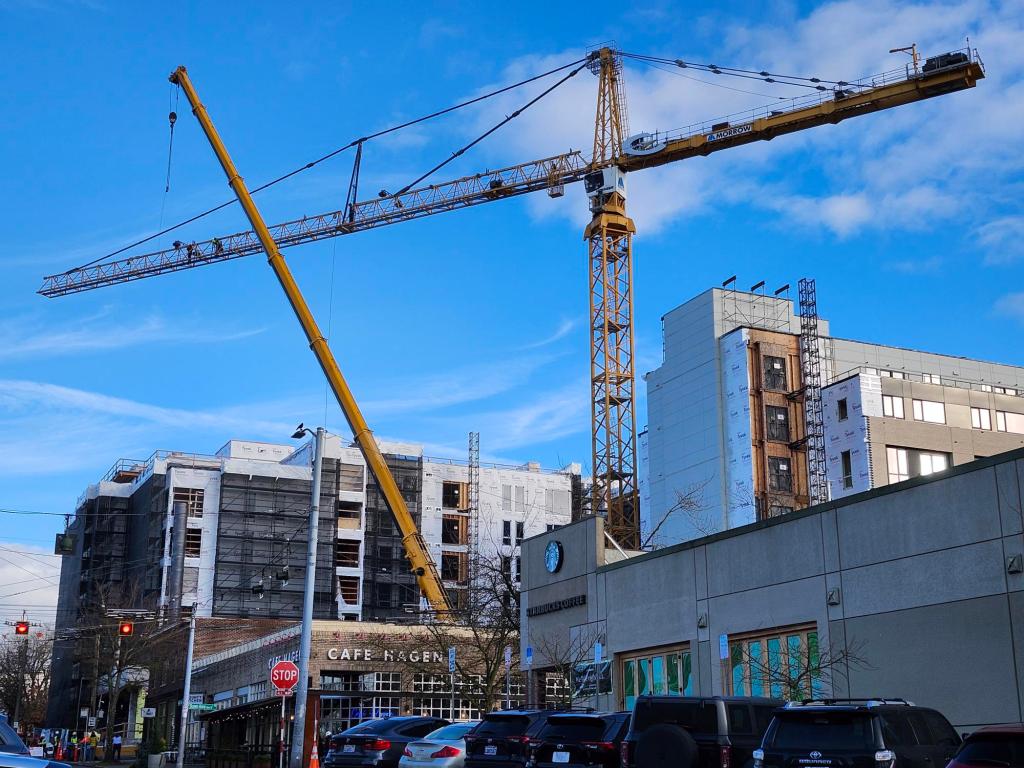
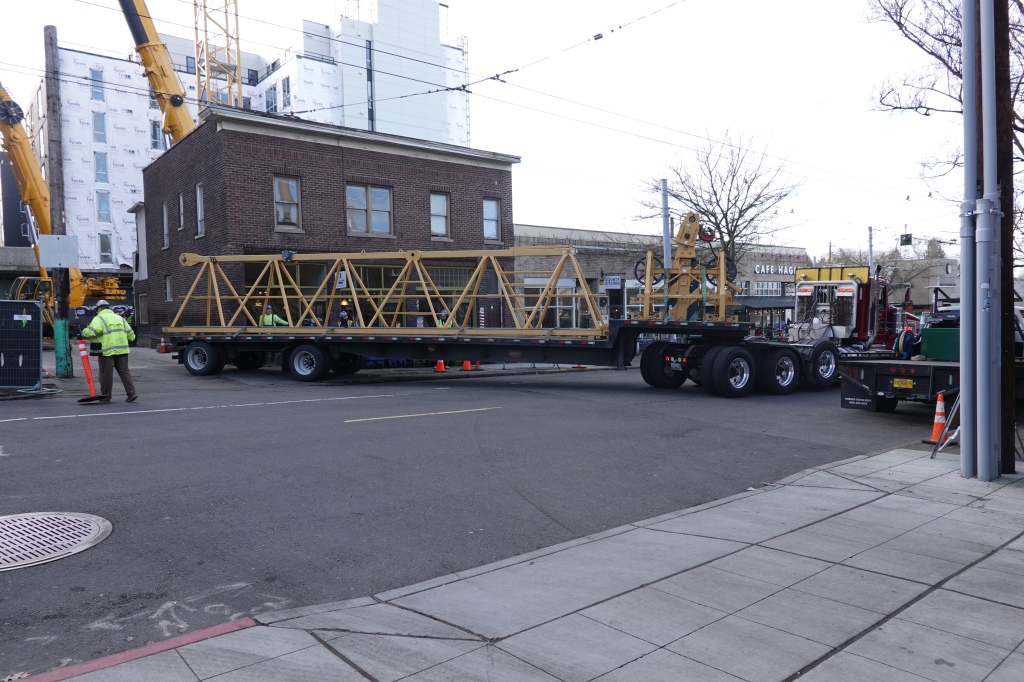
With the trolley out of the way, the process of removing the jib and counter jib could get started. This work occured from the Boston Street service yard, which in the photo below is hidden behind the Cafe Hagen.
With the tower jig swung in an east-west direction, the extension-boom crane reaches up to help get the process started.
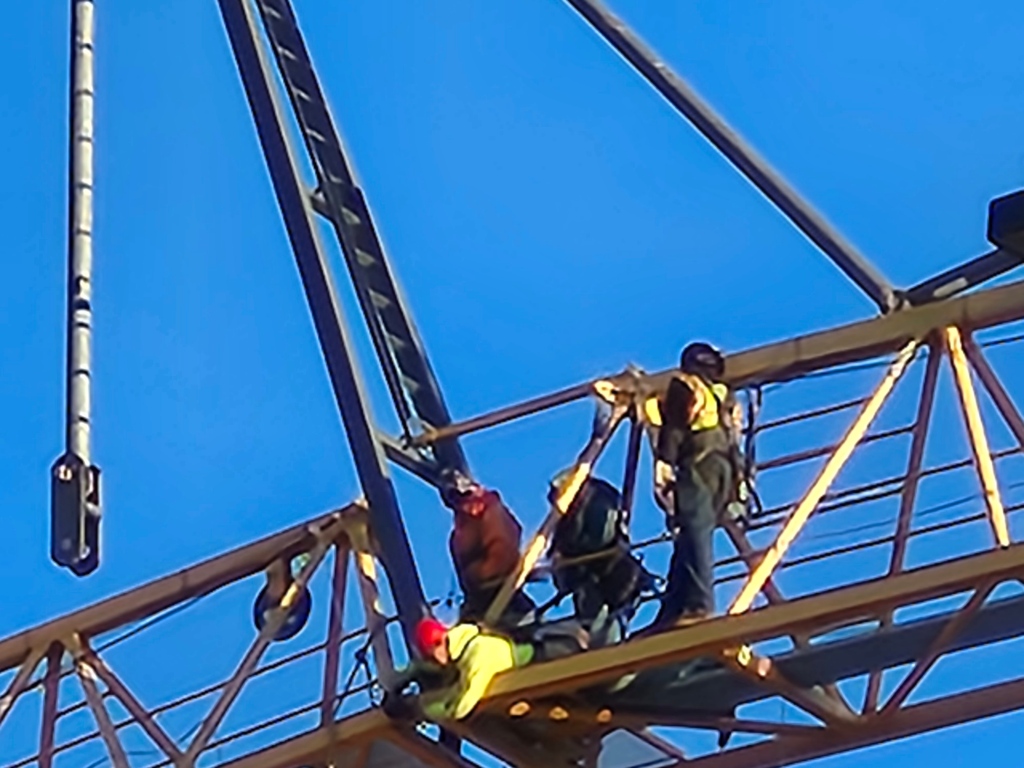
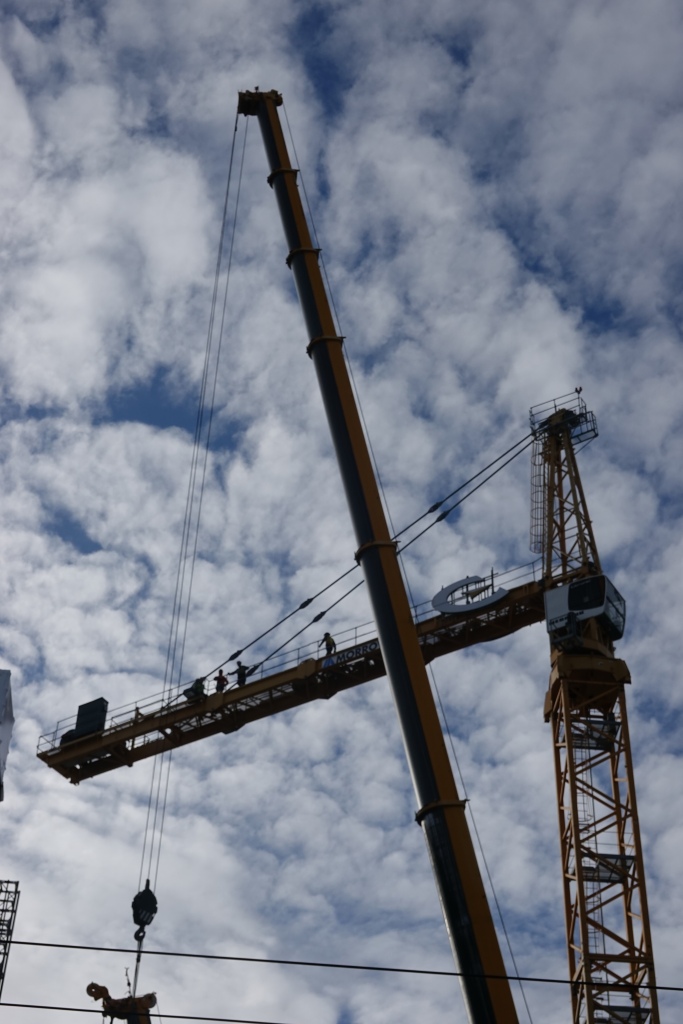
The next piece to be removed will be the end of the jig; but before that can happen, the diagonal fore pendant restraining rod has to be released; but before that the extension-boom crane has to support the jig so it doesn’t flop down. Now with the fore pendant in slack, the workmen can work on loosening the connection between the two pieces of the fore jig. Note one very small detail. There is a rope hanging from the end of the jig, which seems incongruous for such a tough structure; but it will provide a key ingredient to the next step.
This is dizzying work, even with safety harnesses; and it’s also tough. The connections are tight on purpose because of the stresses on the jig; and the workmen had to use sledge hammers to loosen them up.
With the end of the jig freed up, the extension boom crane can swing the jig away. Now it’s clear why that crane, using a double support cable system, is so critical.
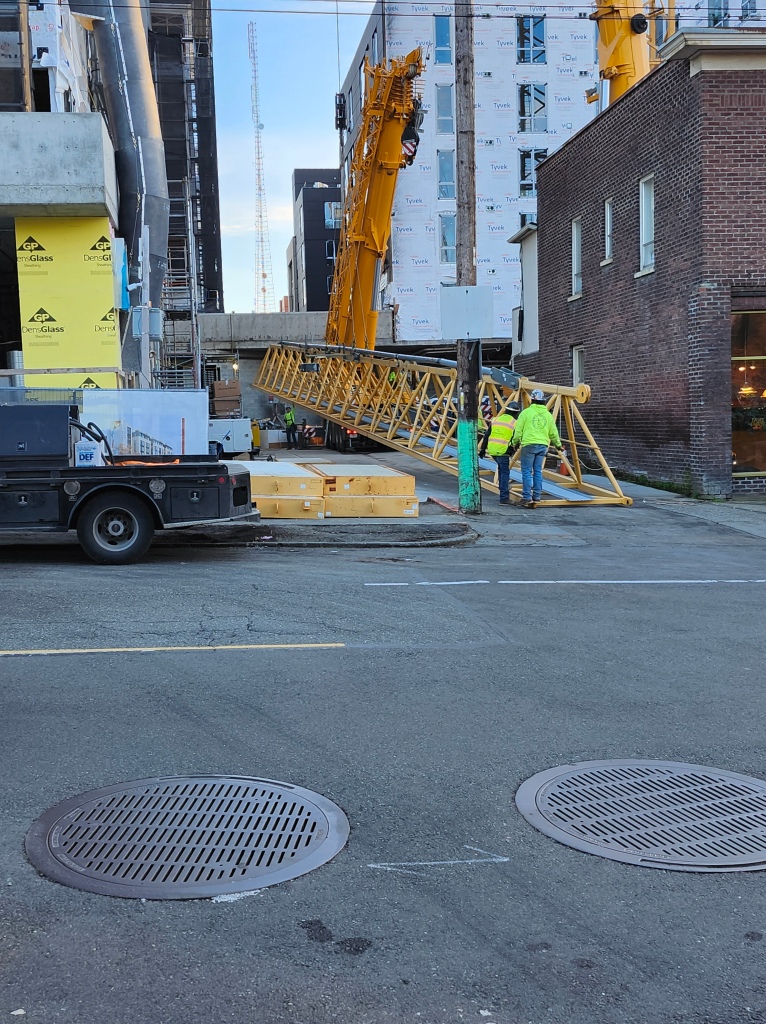
The job then is to somehow steer the free jib into the narrow service driveway below; and that’s where the hanging rope comes in.
Although it’s hard to make out, the rope is hanging at the far end of the jib and is being tugged on by one of the workmen – just the right amount – to line the jib up with the alley, where it can be carefully set down.
Once things are stable, the fore pendant (which has been riding on top of the jib) can be removed and set to one side. By this time, it’s getting to be late in the afternoon; and it’s decided that the remaining jib pieces and tower cab will be taken down the next day.
Now cue a slightly darker and cloudier morning sky. Here, the pendant for the inner portion of the fore jib has been detached while the extension boom crane holds things steady.
Then the same lowering sequence from the previous day takes place – first swinging the jib away from the tower.
Then aligning the jib with the alley below.
Notice one difference, however. This jib comes down with the tower peak attached to it.
This will be removed once the jib is settled and the boss says it’s time.
It was pretty obvious who on the job had the most wisdom about the operation and also clearly garnered the most respect – but who also hustled as needed for the next step as the tower peak is detached (with sledge hammers) from the jib.
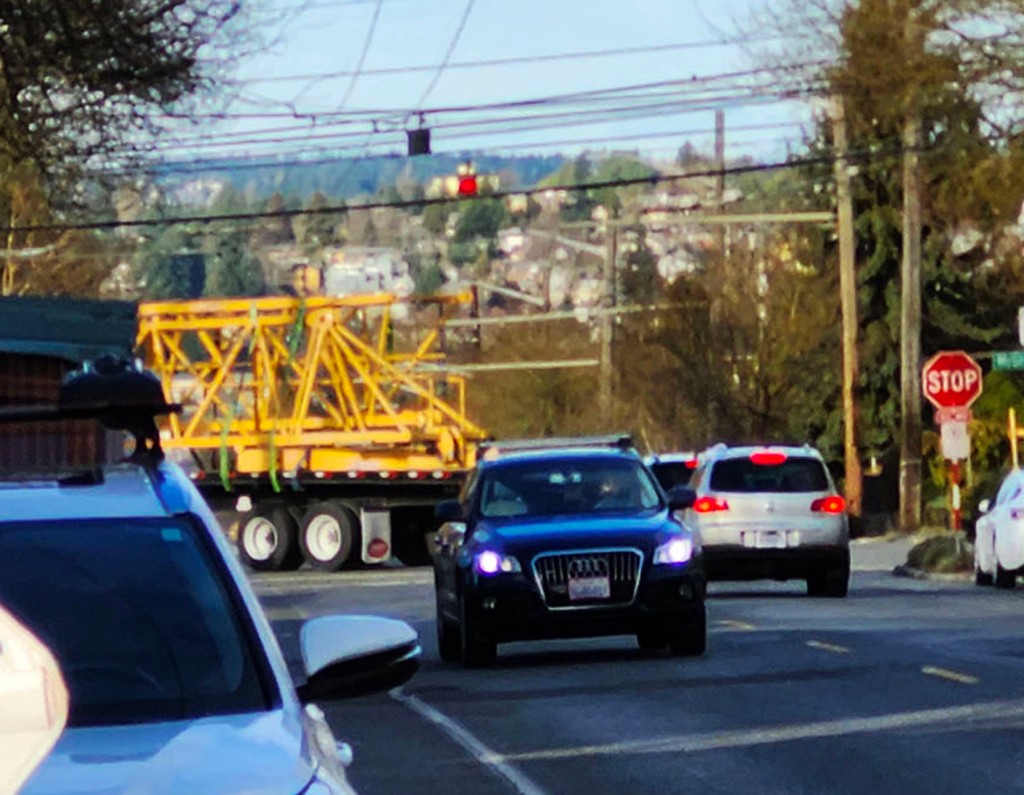
With the tower peak lifted out of the way, the jib can be loaded, along with the trolley, and hauled to the next job.
No small maneuver for the truck; but the driver made it look easy.
All of this left just the counter jib, the rear pendant, and the tower itself to come down. The counter jib was swung around 180 degrees and taken through the same steps as the other jib elements.
The tower and cab would wait for the next morning; so overnight that’s all there was left to be seen of the crane from the neighborhood.
The next morning, the tower cab was lifted down into the alley.
That left a few sections of tower as the only evidence that there had been a crane there.
It was removed, one floor level at a time, using the same movable work platforms from which the bolted connections had been made during the original installation.
And in the end, it was good-bye Queen Anne.
This photo is technically a bit out of sequence, but the gesture is not. It was quite a run. Now we’ll just have to learn to live without the tower crane swinging above our neighborhood.